> ## Documentation Index
> Fetch the complete documentation index at: https://elementary-devin-1782754750-bigquery-permissions-docs.mintlify.site/llms.txt
> Use this file to discover all available pages before exploring further.

# ServiceNow

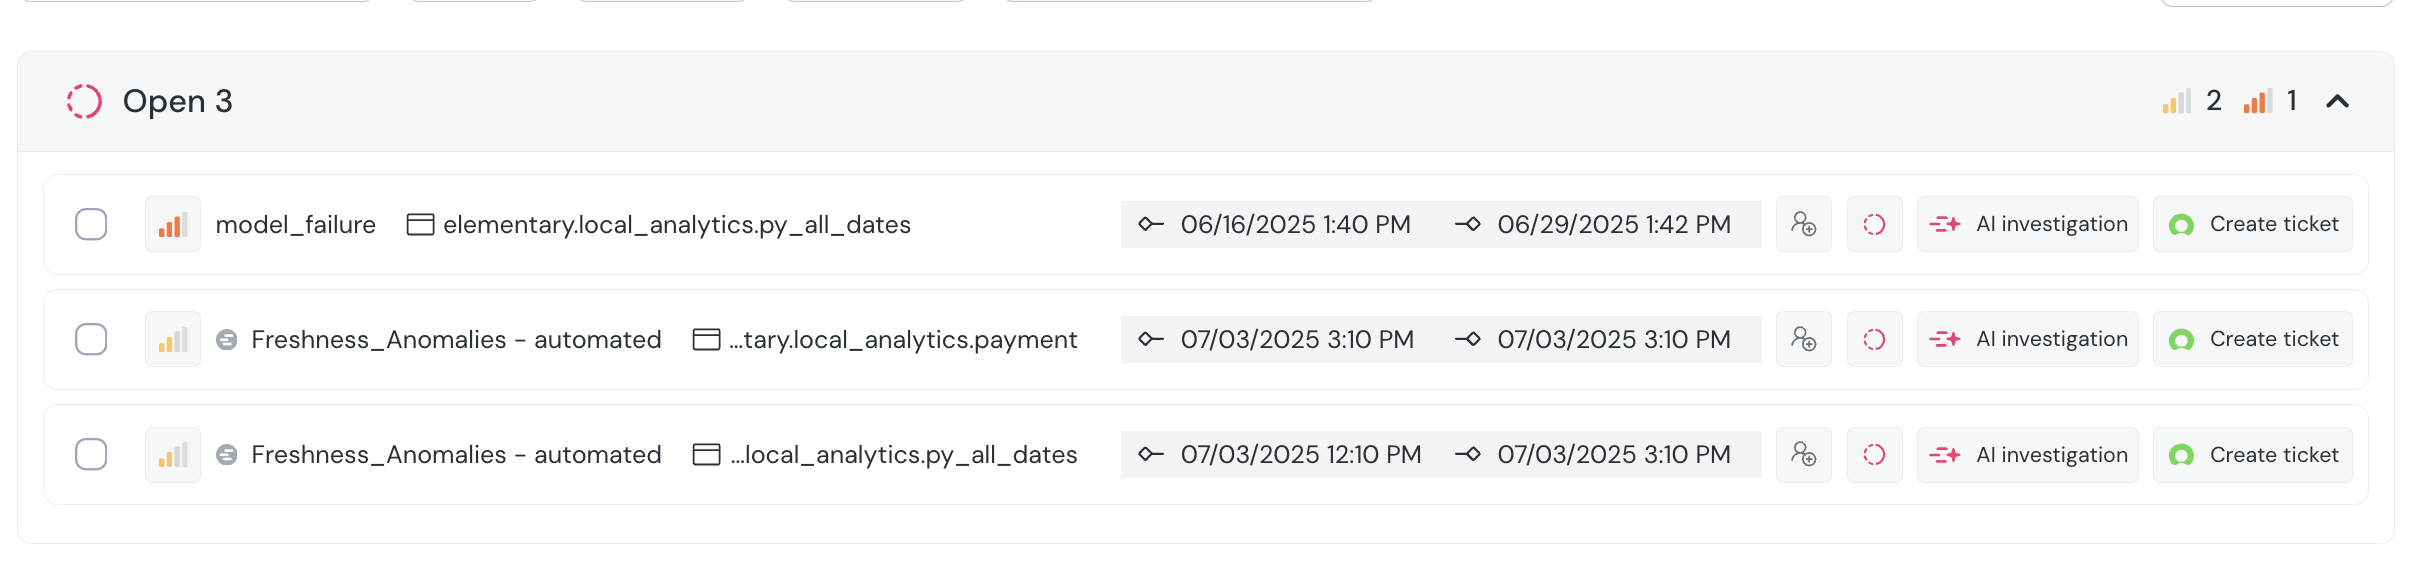
Elementary's ServiceNow integration enables creating ServiceNow incidents from incidents.

<Frame>
  <div className="dark:bg-white rounded-md p-1">
    <img src="https://res.cloudinary.com/do5hrgokq/image/upload/v1751788473/servicenow_create_ticket_ztpeaw.png" width="500" />
  </div>
</Frame>

## Create a ServiceNow app (Admin required)

1. Connect to your ServiceNow instance
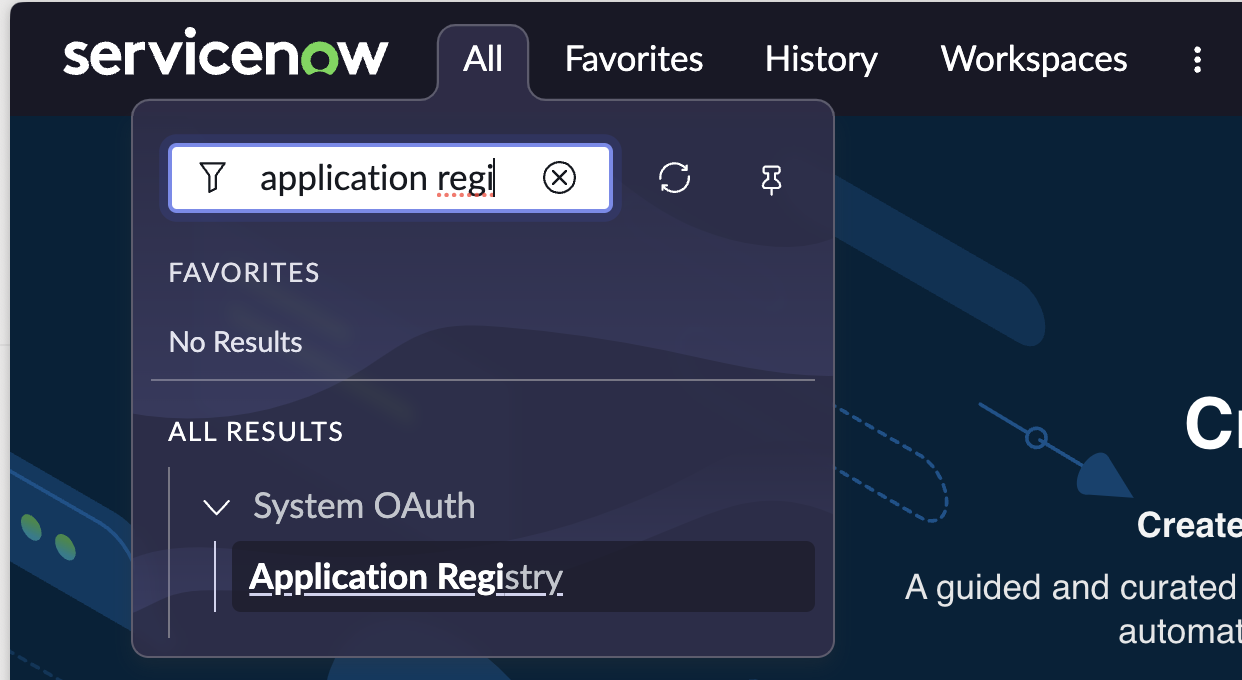
2. Navigate to the `System OAuth` -> `Application Registry` page

<Frame>
  <div className="dark:bg-white rounded-md p-1">
    <img src="https://res.cloudinary.com/do5hrgokq/image/upload/v1751788473/servicenow_app_registry_q7ptec.png" width="500" />
  </div>
</Frame>

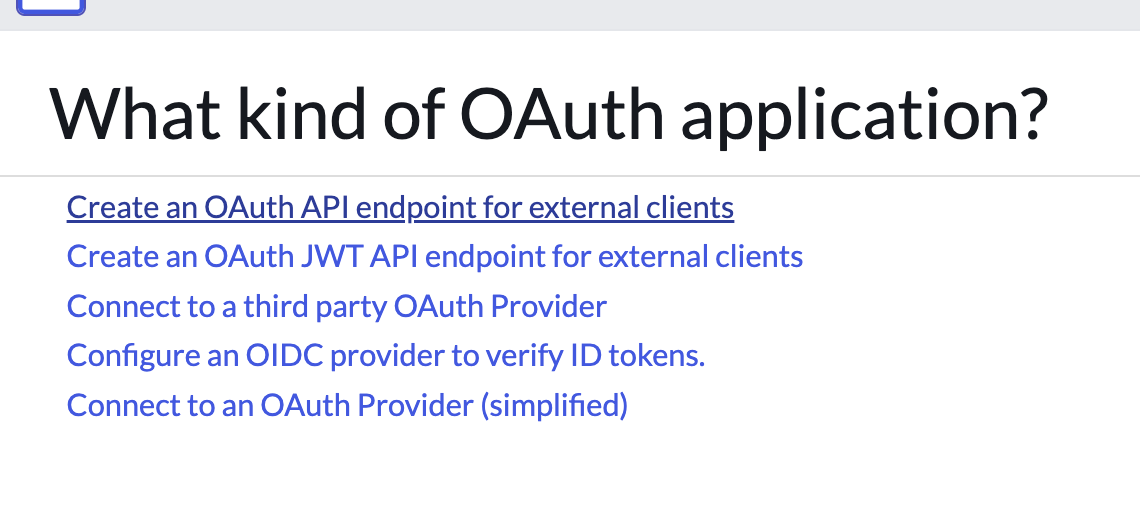
3. Create a new application by clicking `New` -> `Create an OAuth API endpoint for external clients`

<Frame>
  <div className="dark:bg-white rounded-md p-1">
    <img src="https://res.cloudinary.com/do5hrgokq/image/upload/v1751788473/servicenow_oauth_application_k69gma.png" width="500" />
  </div>
</Frame>

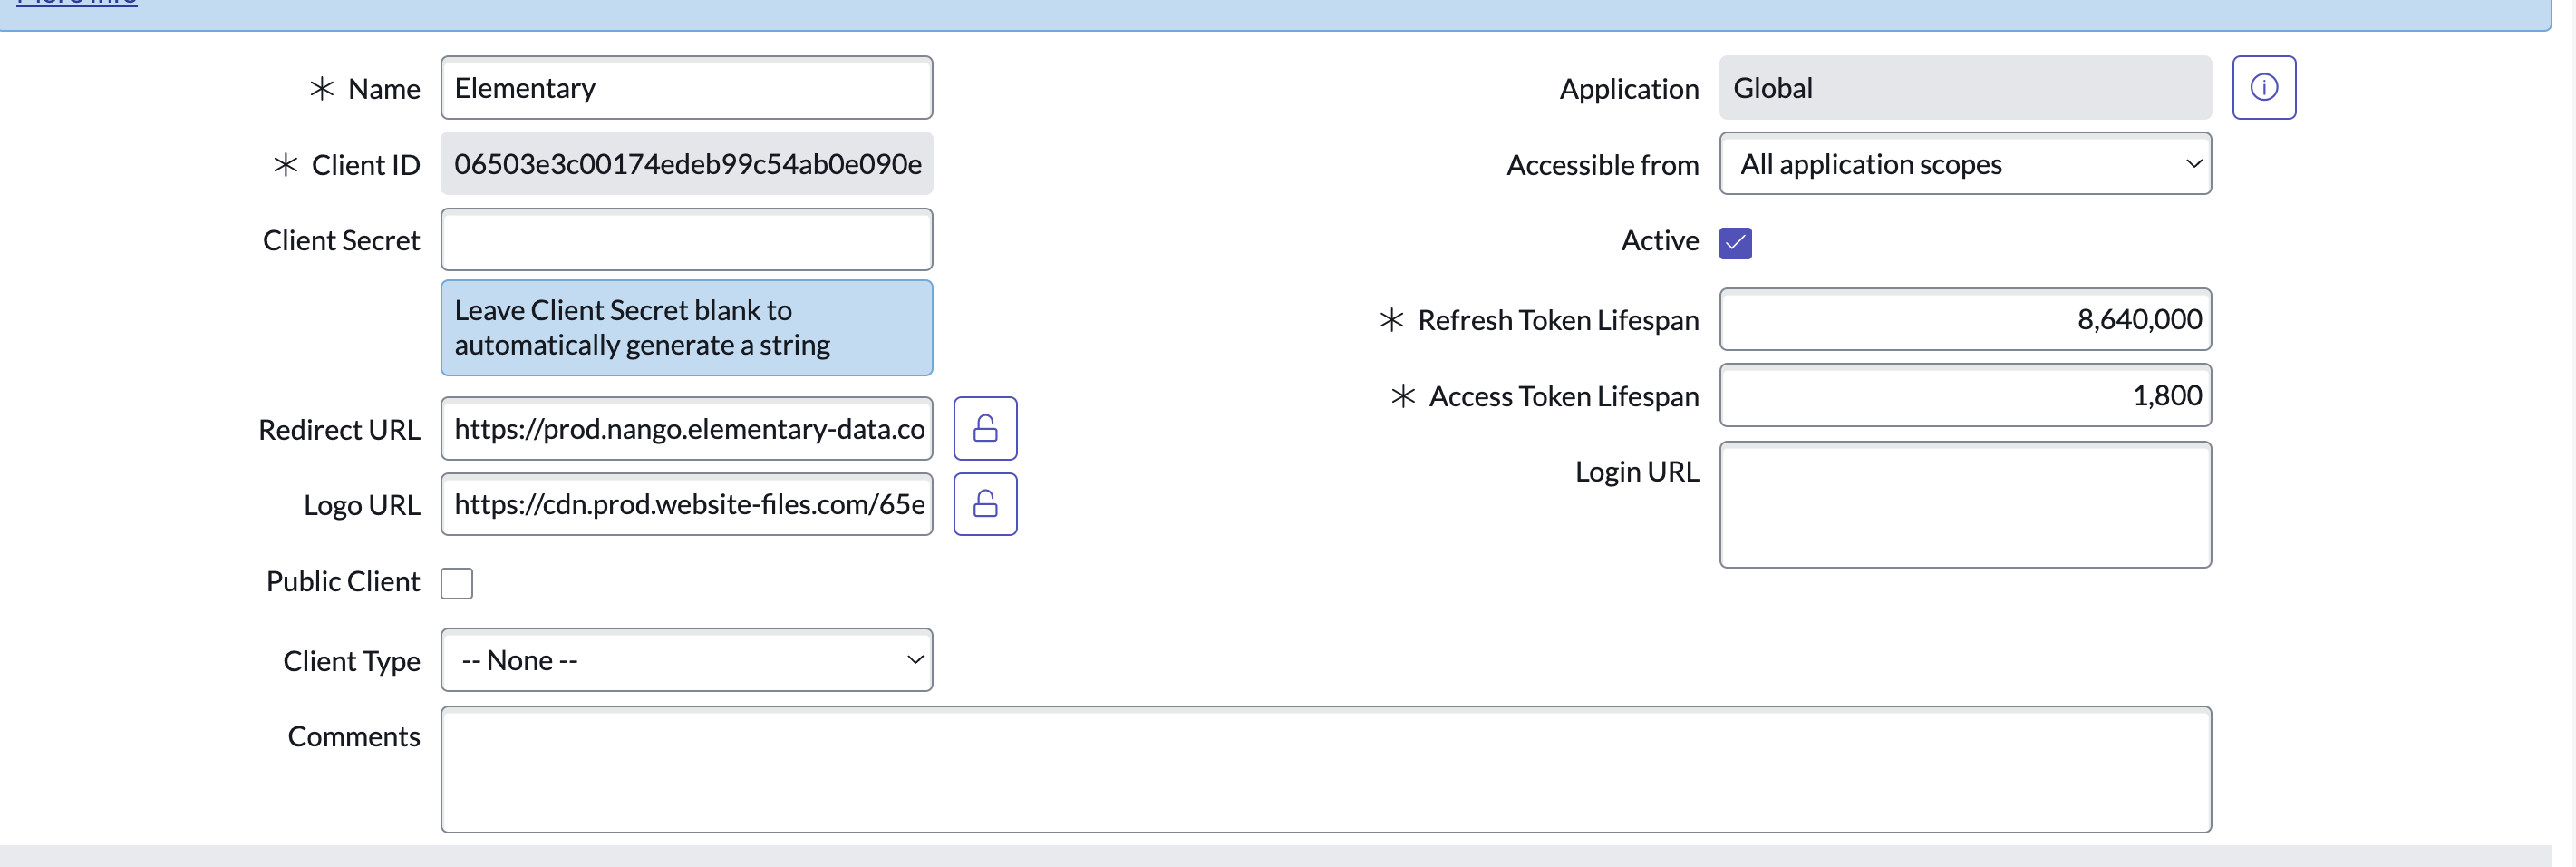
4. Set the following fields:
   * Name: `Elementary` (Reccomended)
   * Redirect URL: `https://prod.nango.elementary-data.com/oauth/callback`
   * Logo URL: `https://cdn.prod.website-files.com/65ec9eebc532cfda4df5fcd7/6781525ba8657fba8fa35446_Vector.svg` (Optional)

<Frame>
  <div className="dark:bg-white rounded-md p-1">
    <img src="https://res.cloudinary.com/do5hrgokq/image/upload/v1751788473/servicenow_oauth_app_ur3box.png" width="500" />
  </div>
</Frame>

5. Save the application
6. Go to the created application and copy the `Client ID` and `Client Secret`

## Add Elementary Link to the incidents table (Recommended)

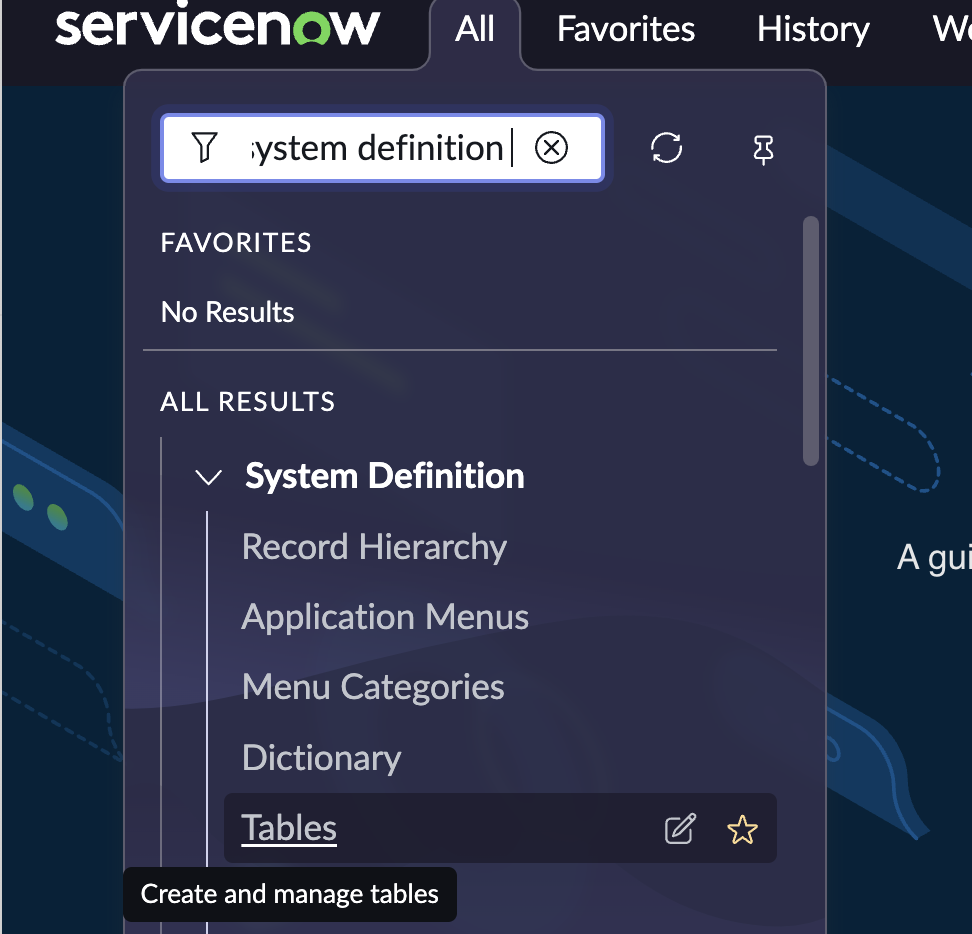
1. Navigate to `System Definitions` -> `Table`

<Frame>
  <div className="dark:bg-white rounded-md p-1">
    <img src="https://res.cloudinary.com/do5hrgokq/image/upload/v1751788474/servicenow_tables_g0gajc.png" width="500" />
  </div>
</Frame>

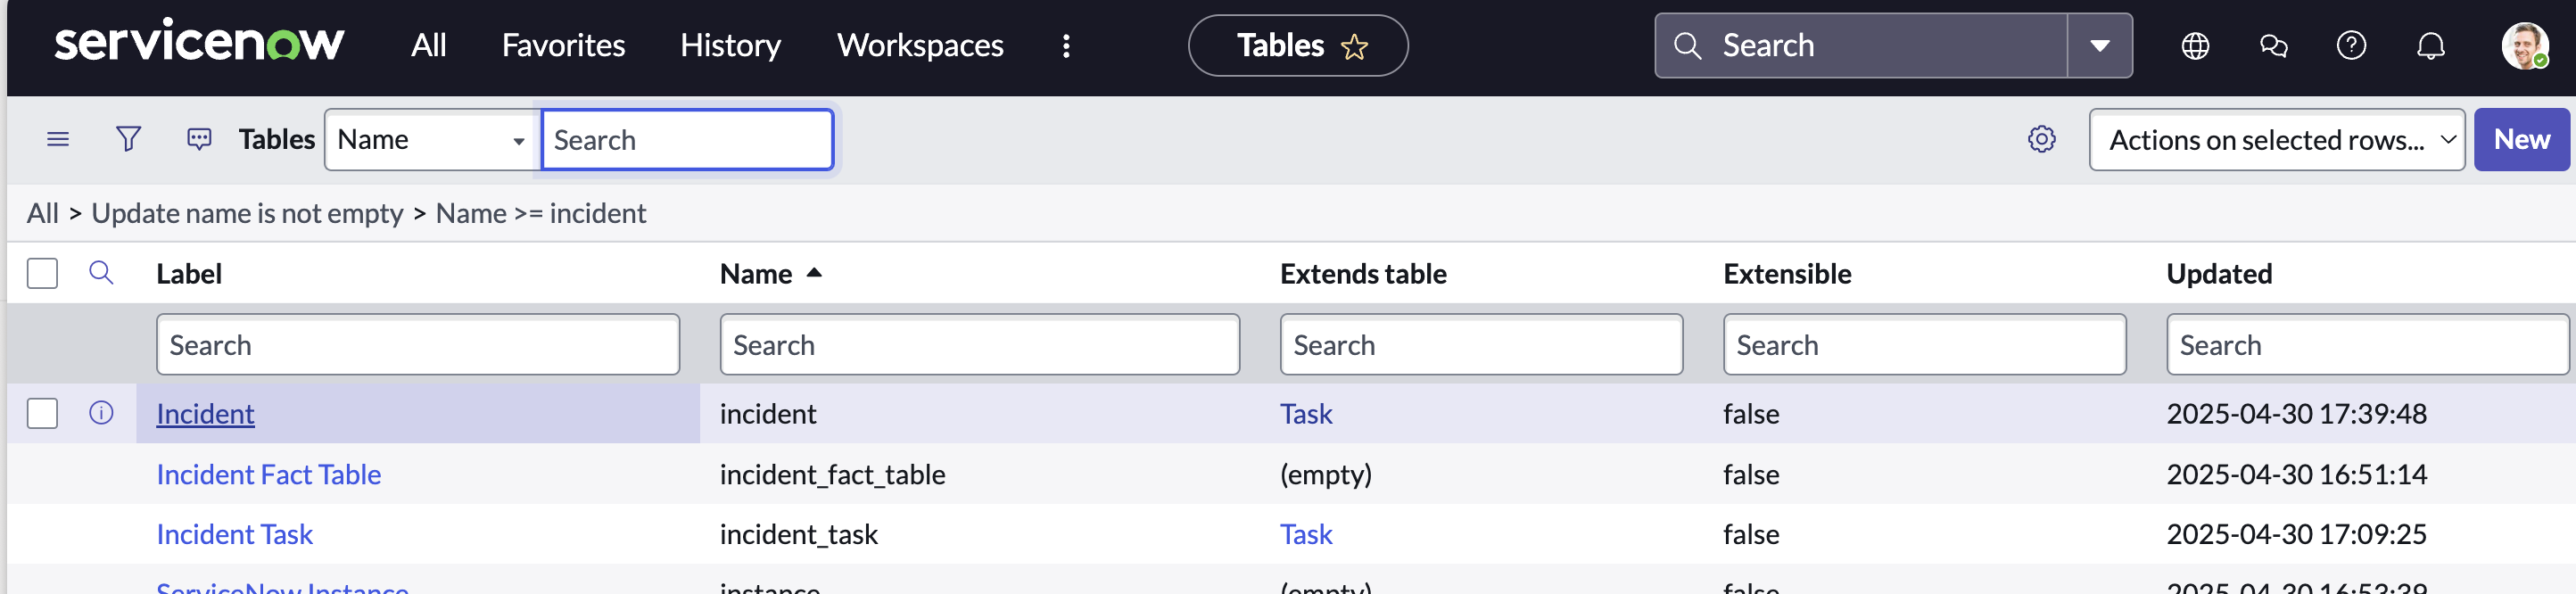
2. Select the `Incident` table

<Frame>
  <div className="dark:bg-white rounded-md p-1">
    <img src="https://res.cloudinary.com/do5hrgokq/image/upload/v1751788474/servicenow_incident_table_u2gvvj.png" width="500" />
  </div>
</Frame>

3. Under `Columns`, click `New`
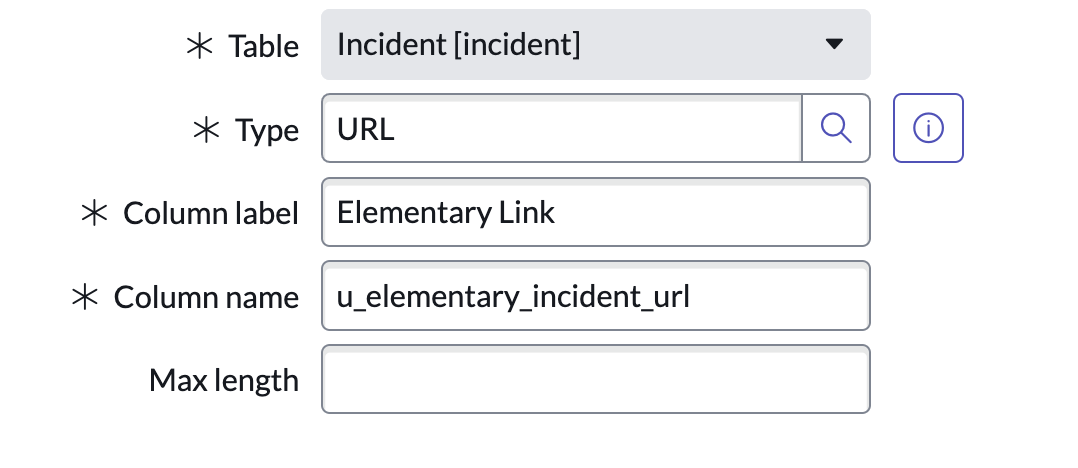
4. Set the following fields:
   * Type: `URL`
   * Column Label: `Elementary Link`
   * Column Name: `u_elementary_incident_url`

<Frame>
  <div className="dark:bg-white rounded-md p-1">
    <img src="https://res.cloudinary.com/do5hrgokq/image/upload/v1751788473/servicenow_elementary_link_x0q0dw.png" width="500" />
  </div>
</Frame>

5. Click `Submit`

## How to connect your ServiceNow app

1. Go to the `Environments` page on the sidebar.
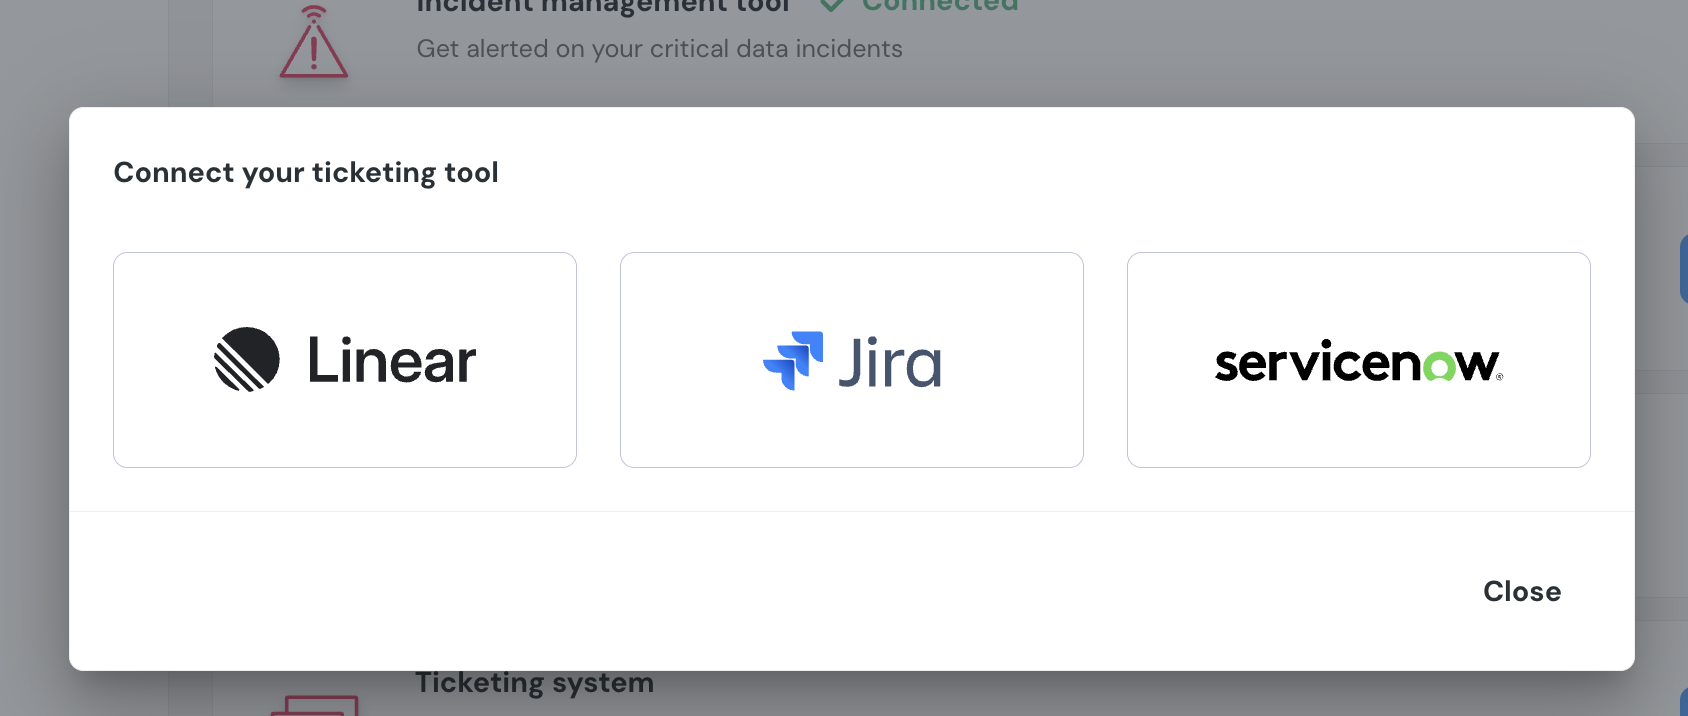
2. Select an environment and click connect on the `Connect ticketing system` card, and select `ServiceNow`.

<Frame>
  <div className="dark:bg-white rounded-md p-1">
    <img src="https://res.cloudinary.com/dvmtceykh/image/upload/v1739794590/connect_zqg0vr.png" width="500" />
  </div>
</Frame>

<Frame>
  <div className="dark:bg-white rounded-md p-1">
    <img src="https://res.cloudinary.com/do5hrgokq/image/upload/v1751788474/choose_ticketing_tool_dv73ab.png" width="500" />
  </div>
</Frame>

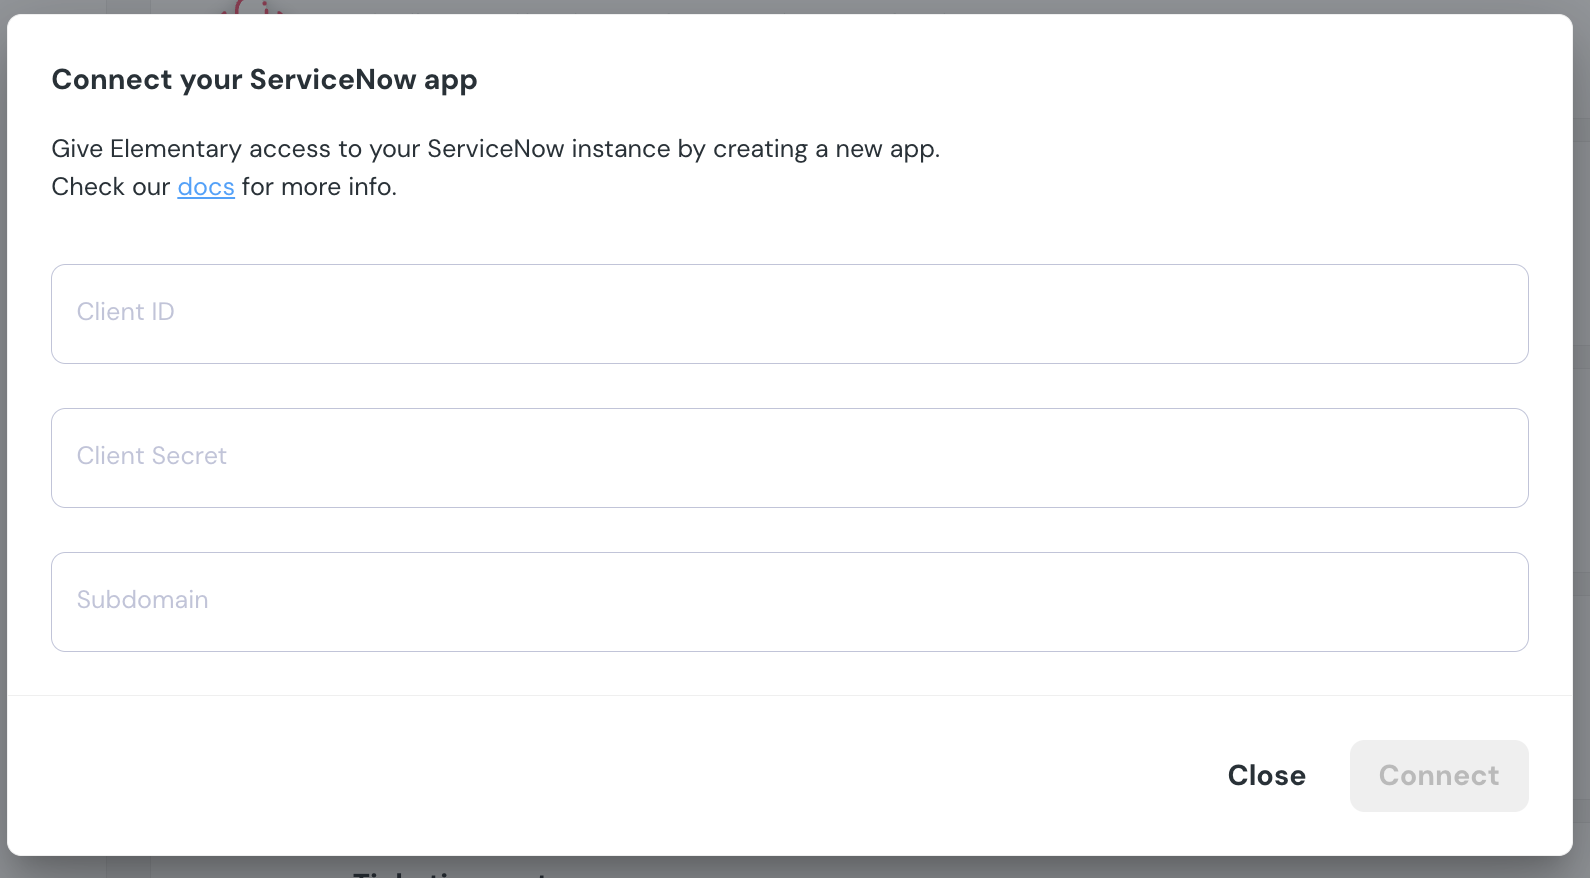
3. Fill in the app details:
   * Client ID: Client ID from the app you created in the previous step
   * Client Secret: Client Secret from the app you created in the previous step
   * Subdomain: The subdomain of your ServiceNow instance (e.g. for `https://my-company.service-now.com`, the subdomain is `my-company`)

<Frame>
  <div className="dark:bg-white rounded-md p-1">
    <img src="https://res.cloudinary.com/do5hrgokq/image/upload/v1751788473/servicenow_app_connect_tcldo8.png" width="500" />
  </div>
</Frame>

4. Click `Connect`
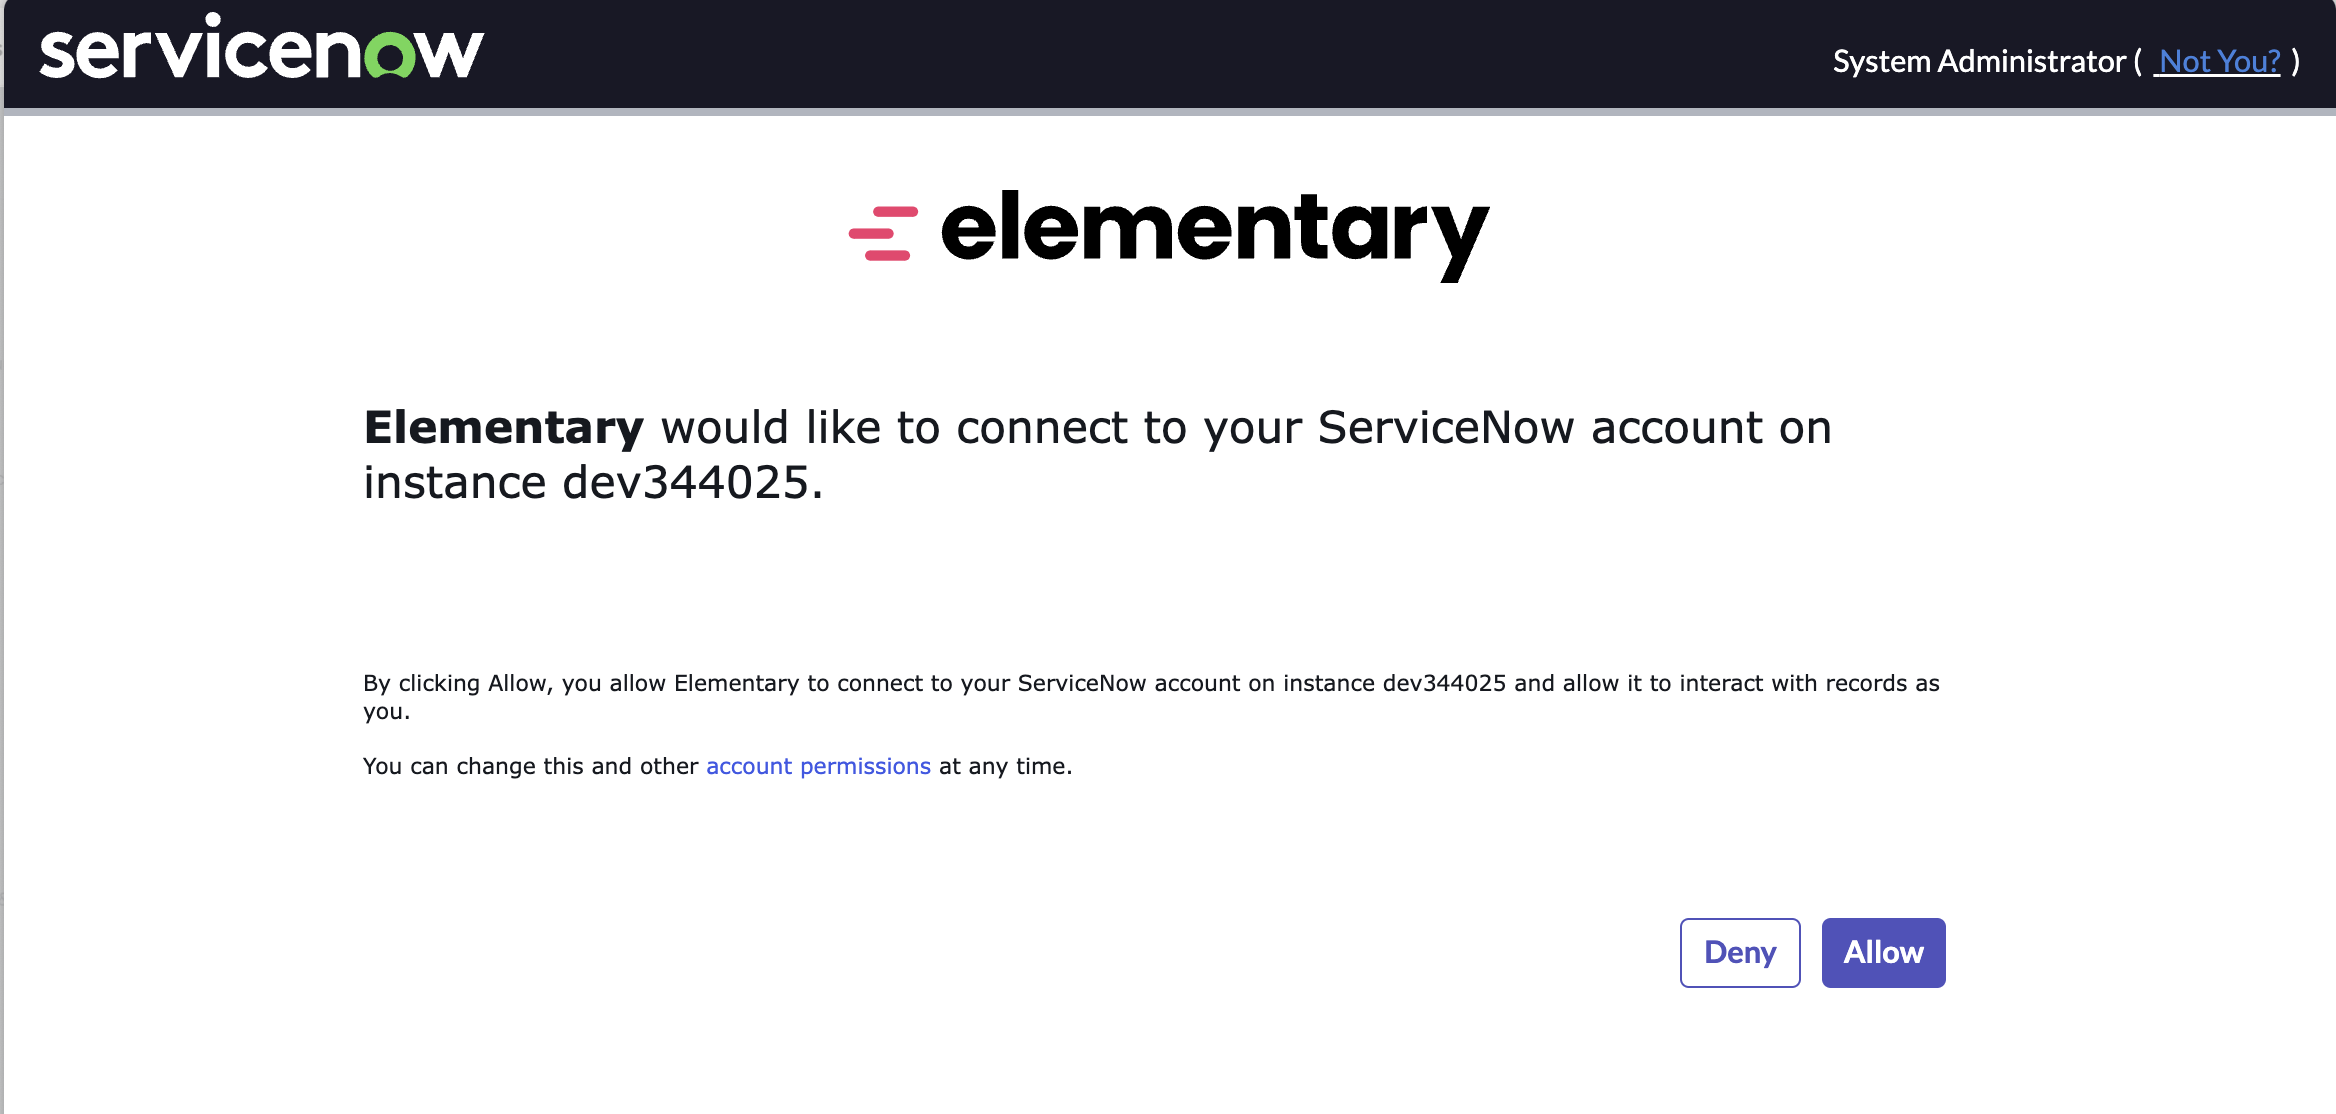
5. Allow the app to access your ServiceNow instance. **This step may require admin approval.**

<Frame>
  <div className="dark:bg-white rounded-md p-1">
    <img src="https://res.cloudinary.com/do5hrgokq/image/upload/v1751788474/servicenow_oauth_rdecta.png" width="500" />
  </div>
</Frame>

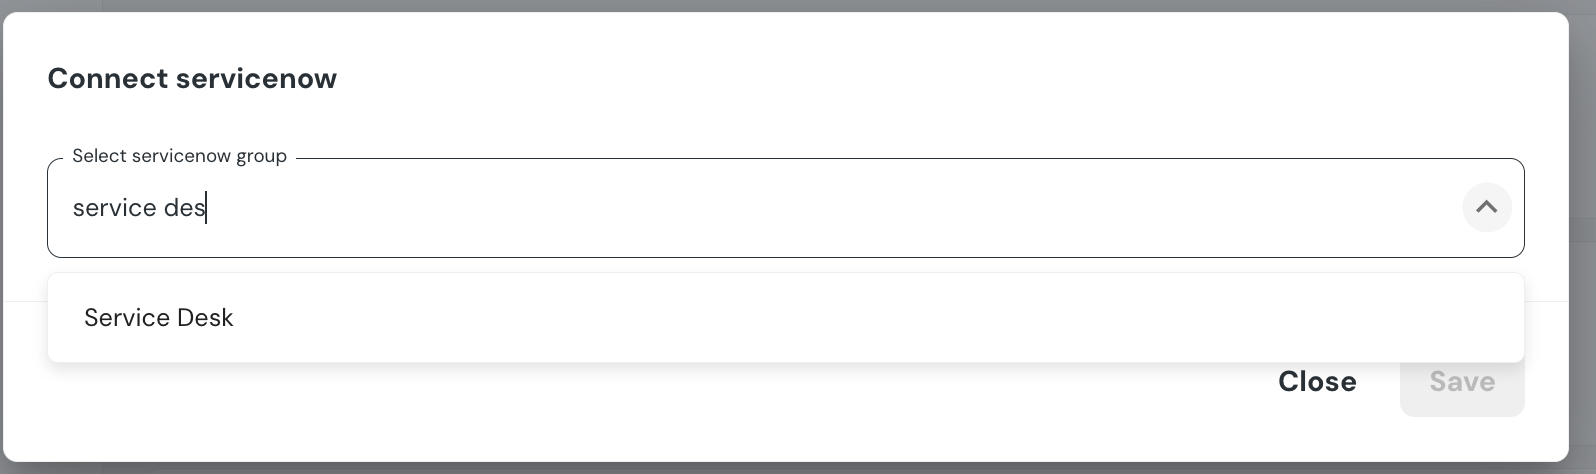
6. Choose a group to assign the incidents to

<Frame>
  <div className="dark:bg-white rounded-md p-1">
    <img src="https://res.cloudinary.com/do5hrgokq/image/upload/v1751788473/servicenow_select_group_klgzmk.png" width="500" />
  </div>
</Frame>

7. Click `Save`

## Creating ServiceNow incident from incidents

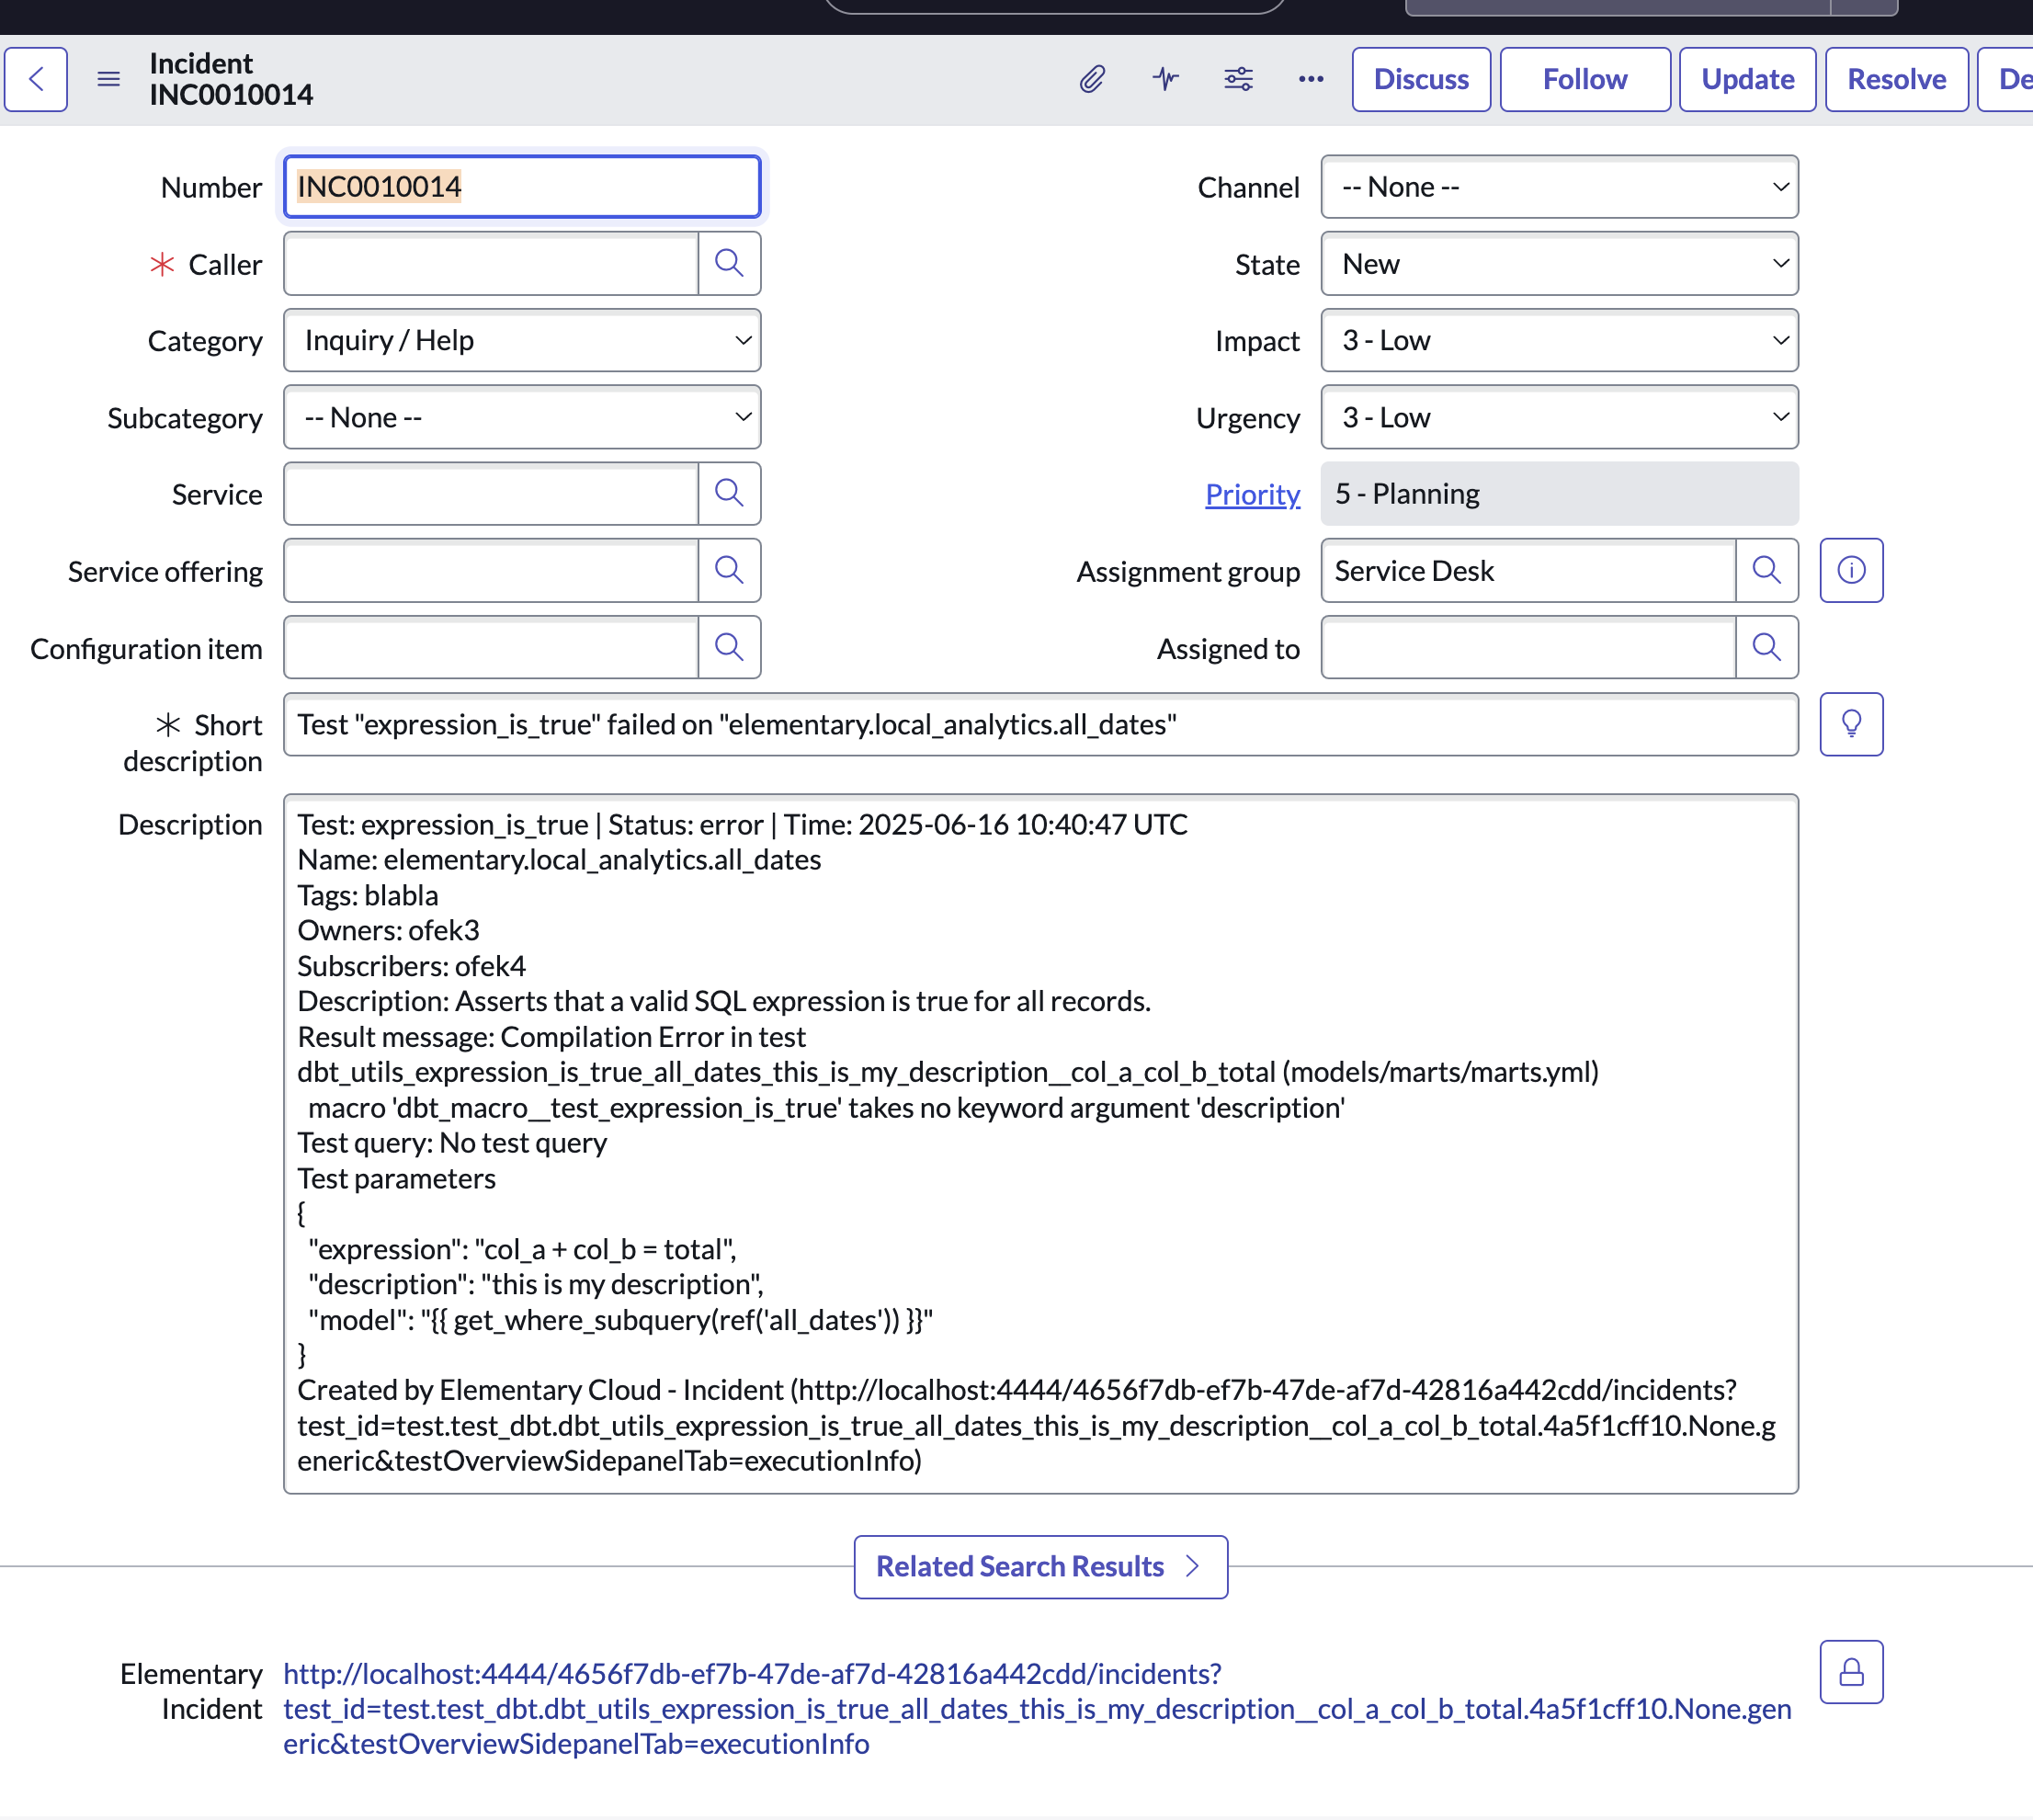
When an incident is created, you can create a ServiceNow incident from the incident page by simply clicking on "Create ticket".
The incident will automatically be created in ServiceNow, in the group you chose upon connecting ServiceNow.

After the ticket is created you can see the ServiceNow incident link in the incident page.
The incident will also contain a link to the incident in Elementary.

<Note>Note: Elementary will not update the incident in ServiceNow when the incident is resolved or changed in any way</Note>

<Frame>
  <div className="dark:bg-white rounded-md p-1">
    <img src="https://res.cloudinary.com/do5hrgokq/image/upload/v1751788475/servicenow_ticket_rxcfrb.png" width="500" />
  </div>
</Frame>